
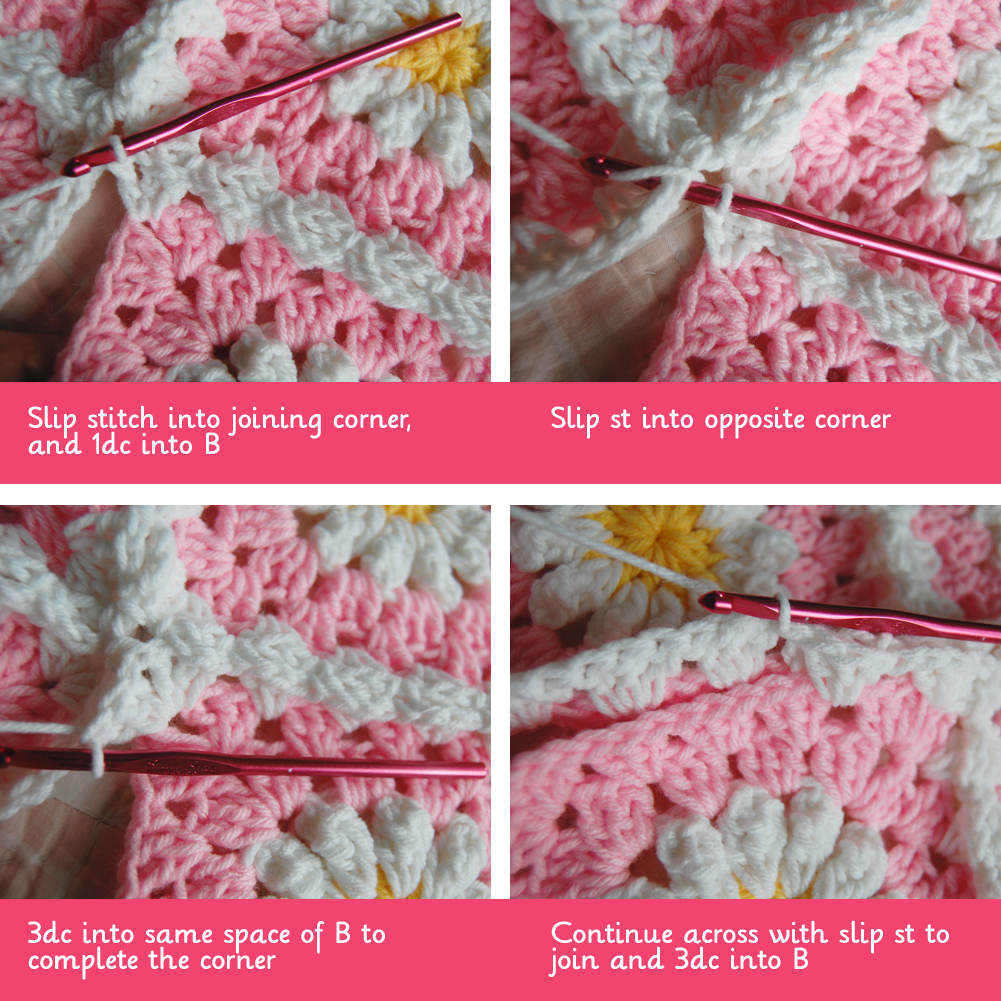
I like using a slip stitch because I feel like it's a tighter firmer join. I also like doing the corners this way, because I personally like how the join looks - not messy, similar to the other "holes", and did I mention I feel it's a sturdy join? This is important when I think about longevity of the blanket.
Without further adieu...


Happy Sunday and thanks for the tutorial....looking foward to make a small baby blanket .beautiful work and gorgeous blog. :0)
ReplyDeleteThank you for this wonderful tutorial. I have wanted to make a purse with this join-as-you go method. Nice blog and beautiful blankets in colors that make one smile.
ReplyDeleteJust started making this blanket for my friends baby. Not sure how big I should make it though. Any ideas? Thanks x
ReplyDeleteHi Leanne, I usually make my baby blankets 4-6 squares across and 6-8 squares down. depending on if I want it a little smaller or larger, and sometimes I'll add an extra round to each square to change it up a bit, so each one is a bit larger. The other factors are the yarn you're using, tension and hook size (I usually use an "I" hook), My squares typically come out to around 6.5". Hope that helps!
DeleteJust finished making this blanket and it looks beautiful! Thank you so much for the lovely tutorials.
ReplyDeleteI do have one question though, I want to add a scalloped edge around the blanket. Do you have a quick suggestion for that?
I have done a scalloped edge with many of these blankets. I usually do a round of white, then a sc round, a dc round and then a 5 dc scallop, skipping 2 st before and after the scallop and a 7dc scallop in each corner. I hope that makes sense. I might have to do a tutorial for this! :)
Delete