Showing posts with label join as you go. Show all posts

Sunday, March 28, 2021

March Minty Granny Square Blanket Set


A co-worker asked me to make a baby gift for her nephew who was having a baby. She asked for grey and minty green colors. I worked up a simple granny square blanket and used the join-as-you-go method for this soft and sweet baby blanket.


I used Caron One Pound Soft Grey Mix and Pale Green; and Red Heart's Soft White. I did 6 squares across by 8 squares down, and added a simple hdc, shell edging followed by a round of the green in hdc. The blanket measures 30"x40".


I added a simple stockinette stitch hat. A FREE pattern is available at the Yarnspirations website here. I went with the newborn size.


I hope you are enjoying your Sunday.


Saturday, August 4, 2012

Join-as-you-go (part II)

Below is the second half of my join-as-you-go method of connecting granny squares. (To view part I, click here).

I like using a slip stitch because I feel like it's a tighter firmer join. I also like doing the corners this way, because I personally like how the join looks - not messy, similar to the other "holes", and did I mention I feel it's a sturdy join? This is important when I think about longevity of the blanket.

Without further adieu...


Thursday, July 26, 2012

My join-as-you-go (part I)

Thank you so much for all of the lovely comments on my last post! I'm waiting to hear back about how Lynette would like the edge to be done. For most blankets, I've been using a round of sc and then a round of dc for a simple border or a scalloped edge for a little something sweet. As promised, below is how I put all of those squares together.

There are many different methods of joining granny squares - weaving, slip and single crochet, etc - but my favorite is to join as you go. Once again, my instructions may be slightly different than others you've seen, this is just how I do it and what works best for me!

Hopefully, I can relay this well, and it won't seem too confusing. Like anything, the more you do it, the easier it becomes.

If your squares are all different: arrange your completed squares how you would like them to appear, then create a pile for each row. I start from the top down, and stack from the righthand side on top. (Note: If all of your squares are the same: disregard these first two steps. Pile them up and work however many across.)


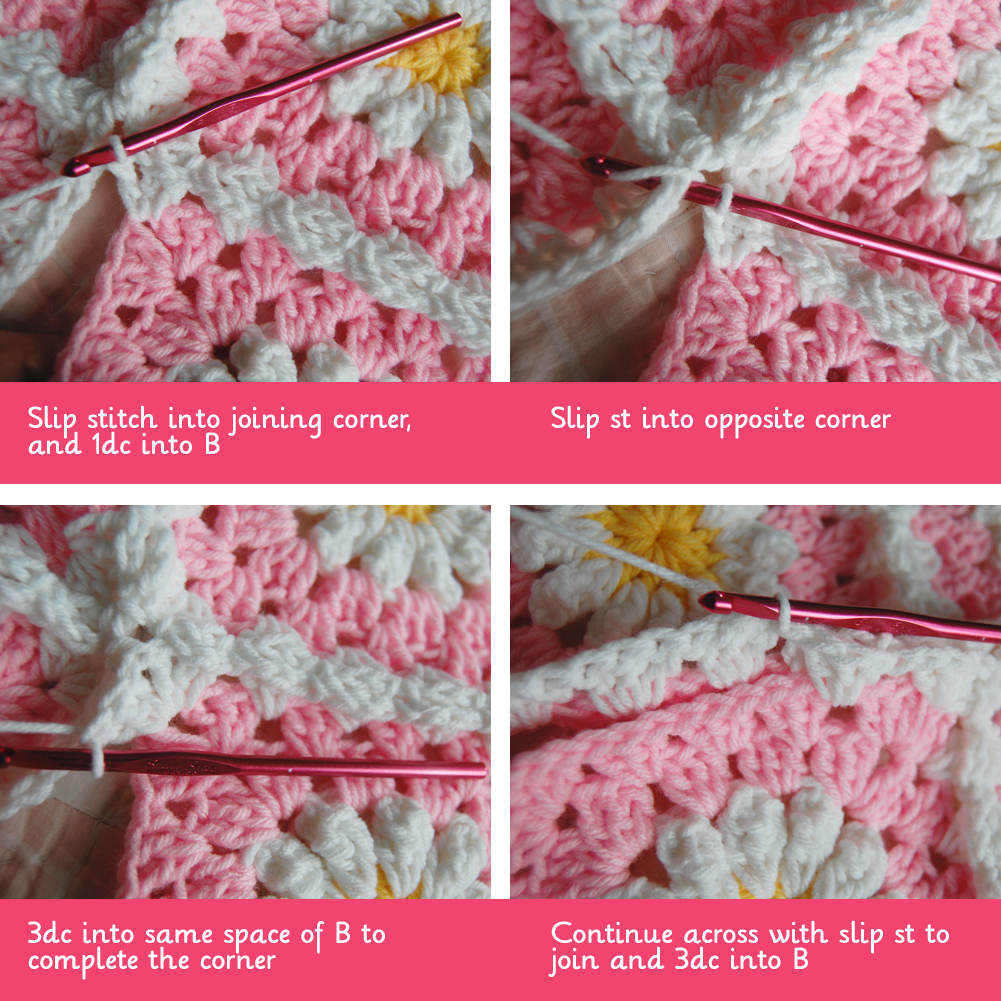
I hope that made sense. Keep connecting the squares in the row, and I'll post some more photos of how I work the connecting corners tomorrow! (To view part II, click here).

Note: If you would like to sell items you have made with my patterns, please do give credit to Tillie Tulip. Thank you.